
Transforming Leather: A Step-by-Step Guide to Dyeing Your Shoes
We're diving into the art of dyeing leather shoes, specifically a lovely pair of Crockett & Jones oxfords. If you've ever wondered how to change the color of your shoes, stick around as I walk you through the entire process, step by step.
Table of Contents
Today, we’re taking on the challenge of dyeing leather shoes, specifically a stunning pair of Crockett & Jones oxfords. Trust me, by the end of this process, you’ll have the confidence to transform your own shoes. Let’s roll up our sleeves and get into it!
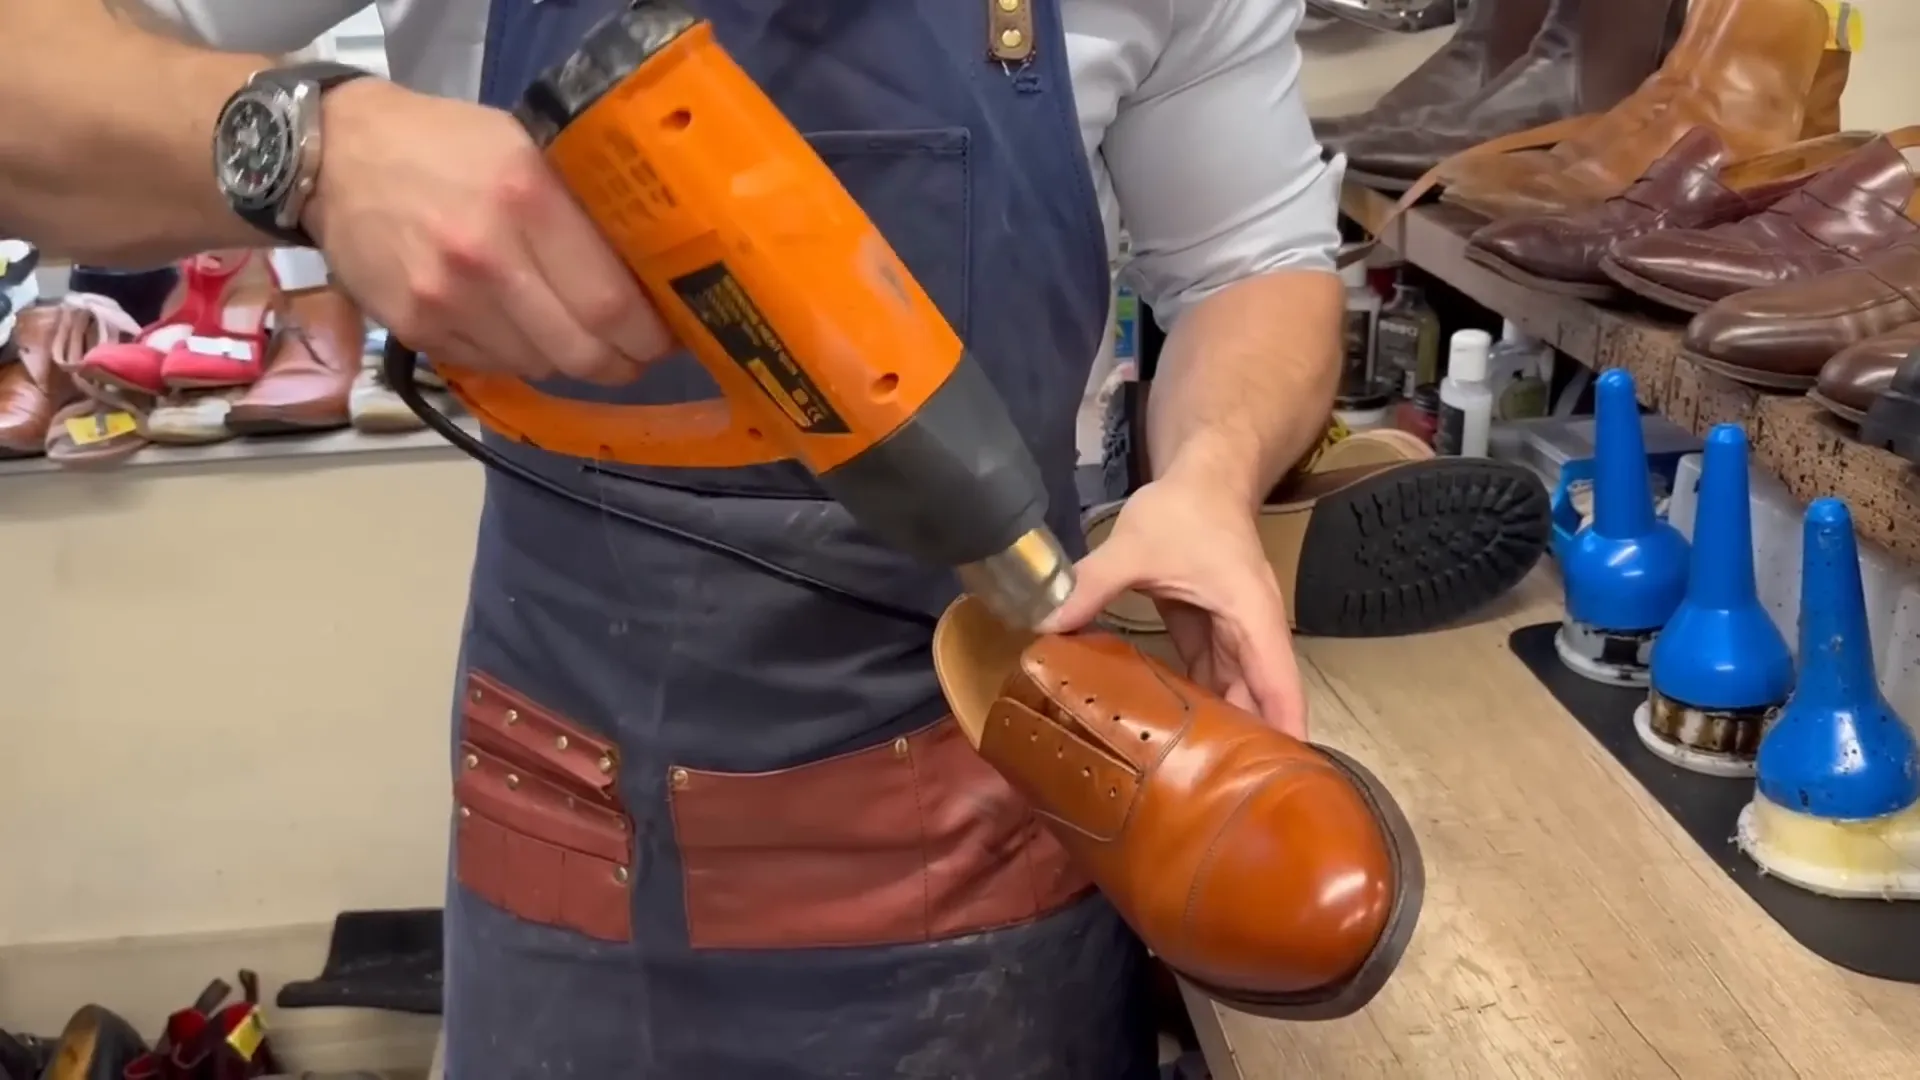
Applying Heat
First things first, we need to prep the shoes. Grab your heat gun! This step is crucial. By applying heat to the uppers, we’re loosening up the old color and any finish that’s currently on the leather. This makes stripping the glaze much easier.
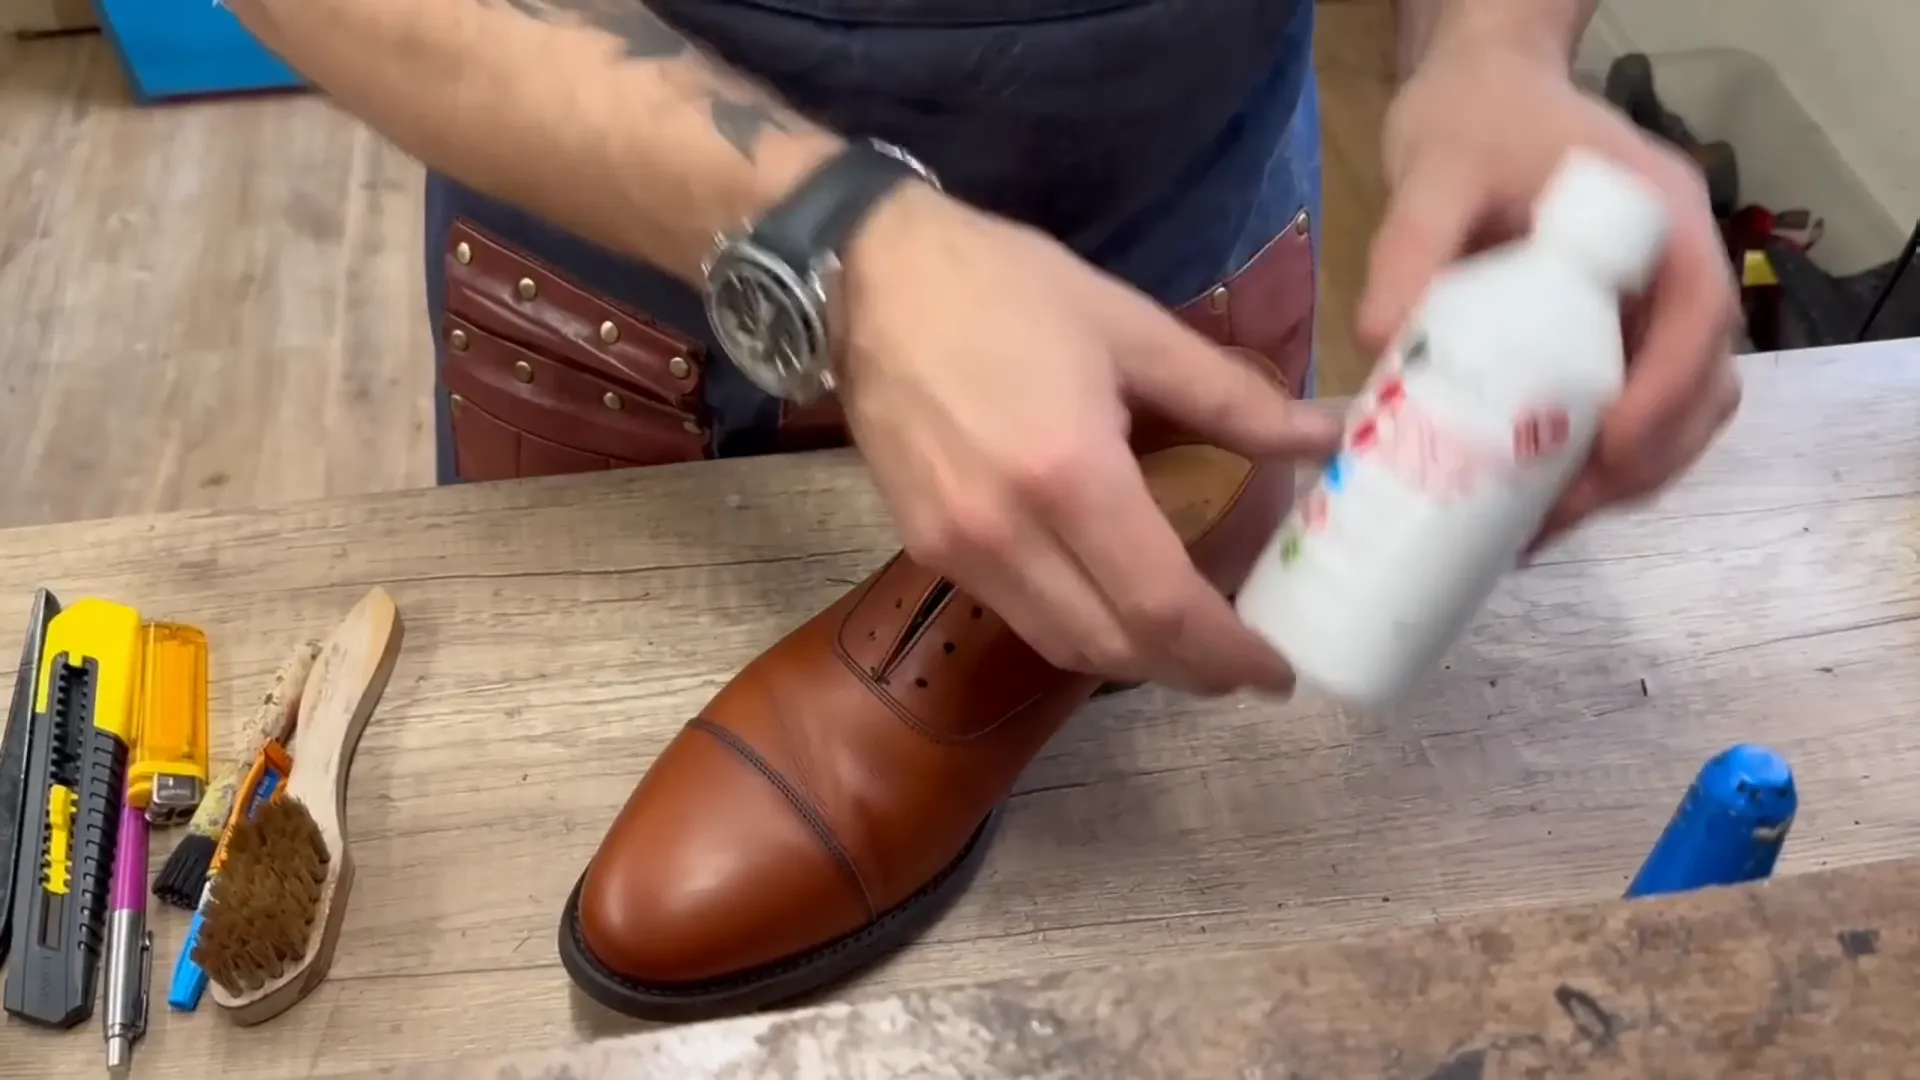
Once we’ve heated up the uppers, it’s time to remove all the old polish and finish. Remember, we’re not stripping the original color—just the top glaze. For this, we’re using Sapphir Reno Mat. It’s a fantastic stain remover and will help strip off that top finish effectively.
Take an old rag, apply a decent amount of Reno Mat, and cover the entire shoe. Once that’s done, grab a dauber and give it a thorough scrub. Make sure to get into the creases between the uppers and the welt. This step ensures we remove color uniformly across the shoe.
After scrubbing, let the Reno Mat soak in for about 15 minutes. This soaking time really helps to strip off the old color. While we wait, you might hear some splashes outside—just another reminder that summer is here!
Stripping Off the Glaze
Now that our time is up, it’s time to wipe off the residue. Use a clean rag to firmly wipe over the uppers to drag off any remaining product. We are looking for a nice dark tan finish, and the original color of the shoe will influence the final result. For this transformation, we’ll be using a chocolate-colored dye on top of the existing Chestnut color.
Next up, we’ll take some rubbing alcohol. This will help ensure that we remove any remnants of the Reno Mat and polish. It’s normal for the leather to darken when applying alcohol, but don’t worry—it’ll lighten as it dries. Make sure to get into all the creases to eliminate any chemical residues. Leaving them could affect how the dye adheres.
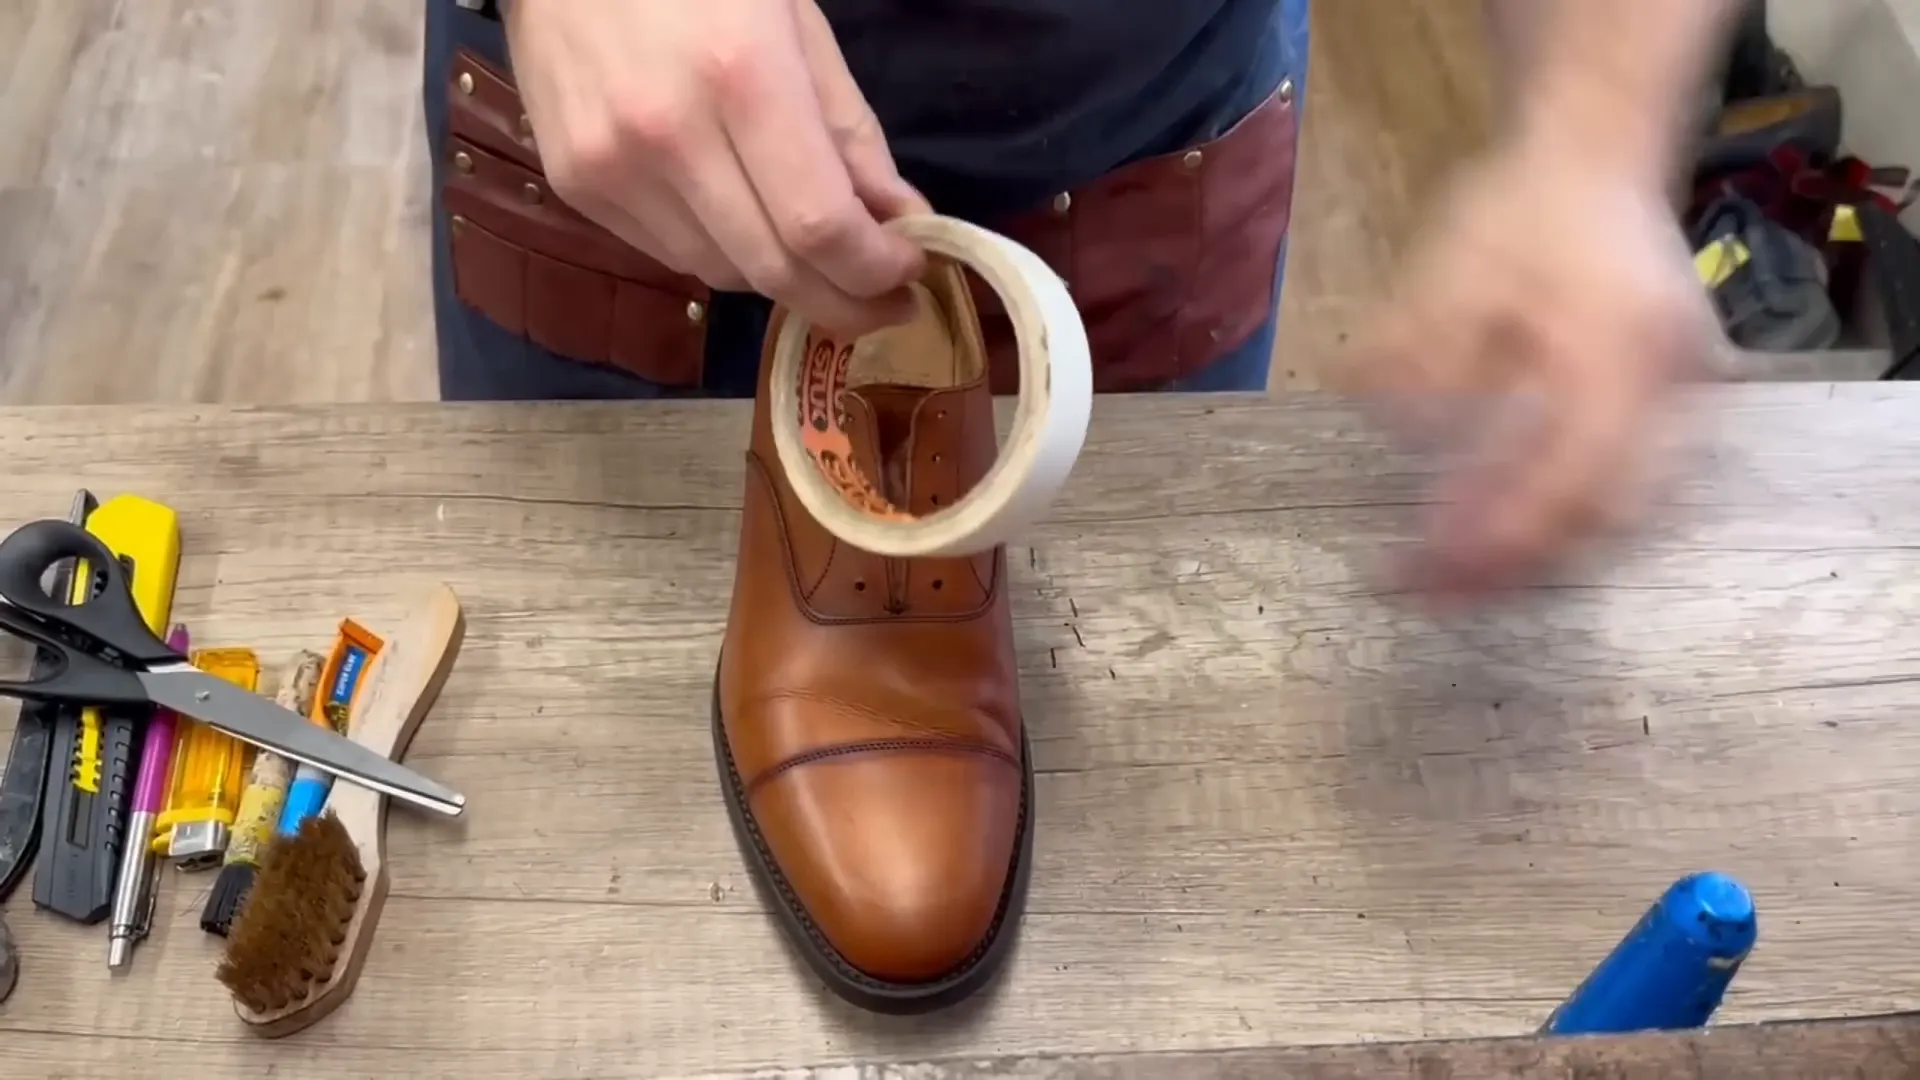
Oh, and don’t forget the tongue of the shoe! We want to make sure it gets dyed too, so we’ll need to protect the inside lining with some masking tape before we begin the dyeing process.
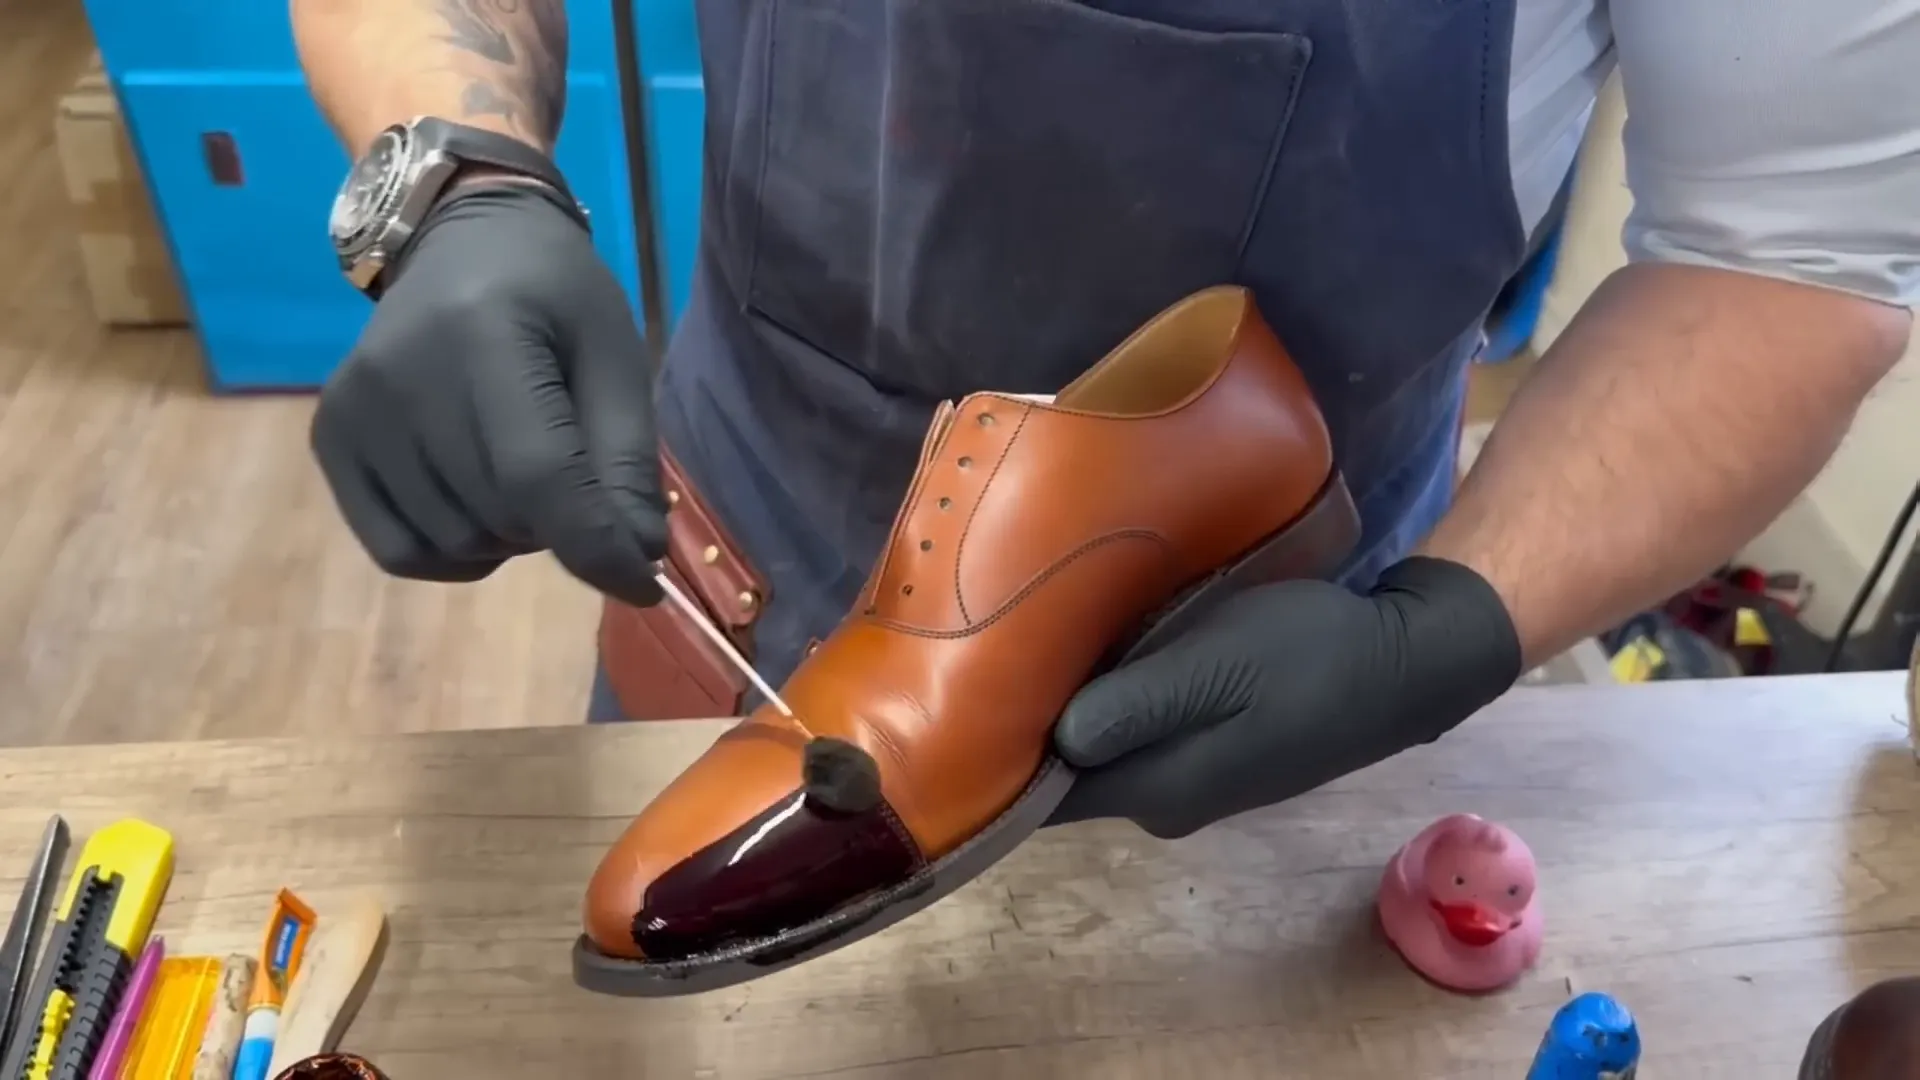
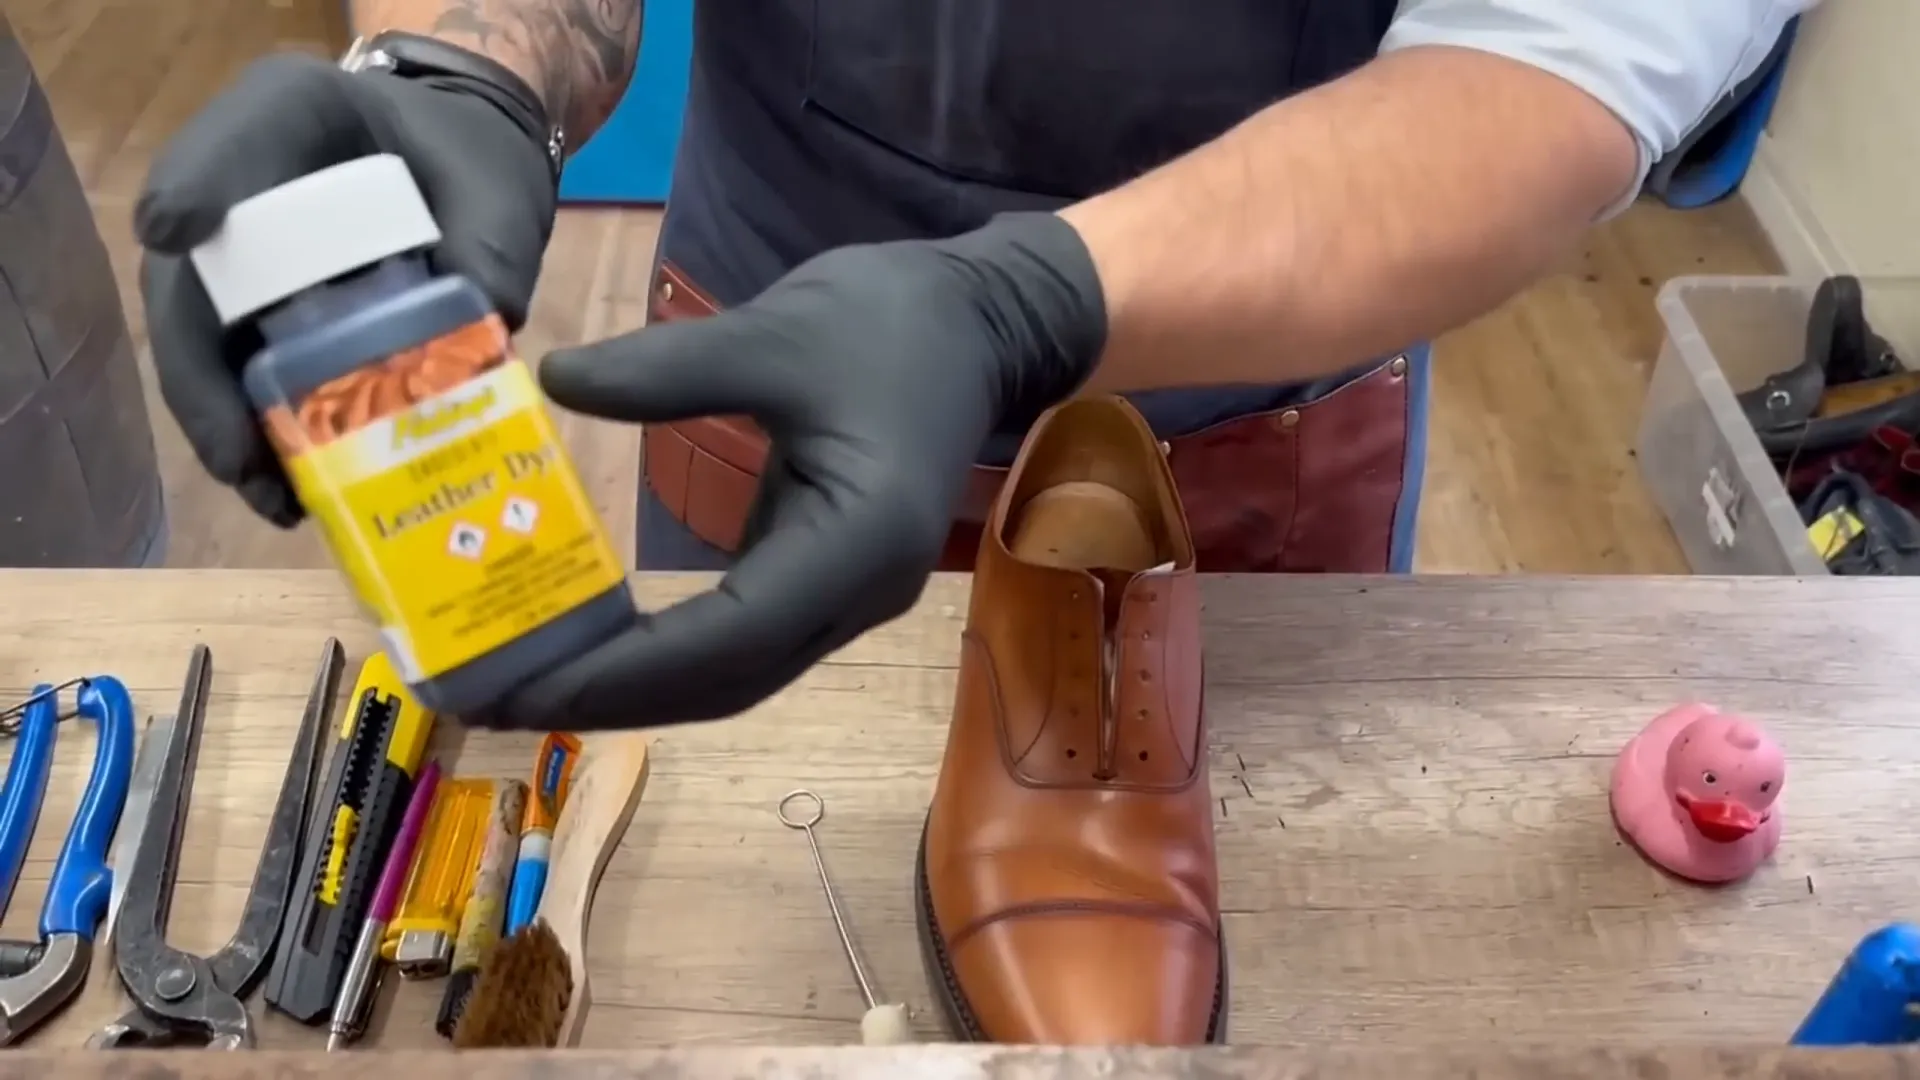
Now, we're ready for the fun part—dyeing! We’re using Fiebing’s professional dye in a chocolate color. This will give us that rich, dark tan finish we’re after. Start applying the dye at the toe cap, making sure to get into the crease between the uppers and the welt.
It’s important to note that the first coat might look a bit streaky. That’s perfectly fine! We’ll need multiple coats to achieve a solid, uniform finish. The more layers you apply, the darker the final color will be. So, don’t rush this step; take your time to ensure even coverage.
Once the first coat is dried, we’ll go for a second coat. This will deepen the color even more. After both layers have cured and set, we’ll buff off any excess dye to reveal our new color!
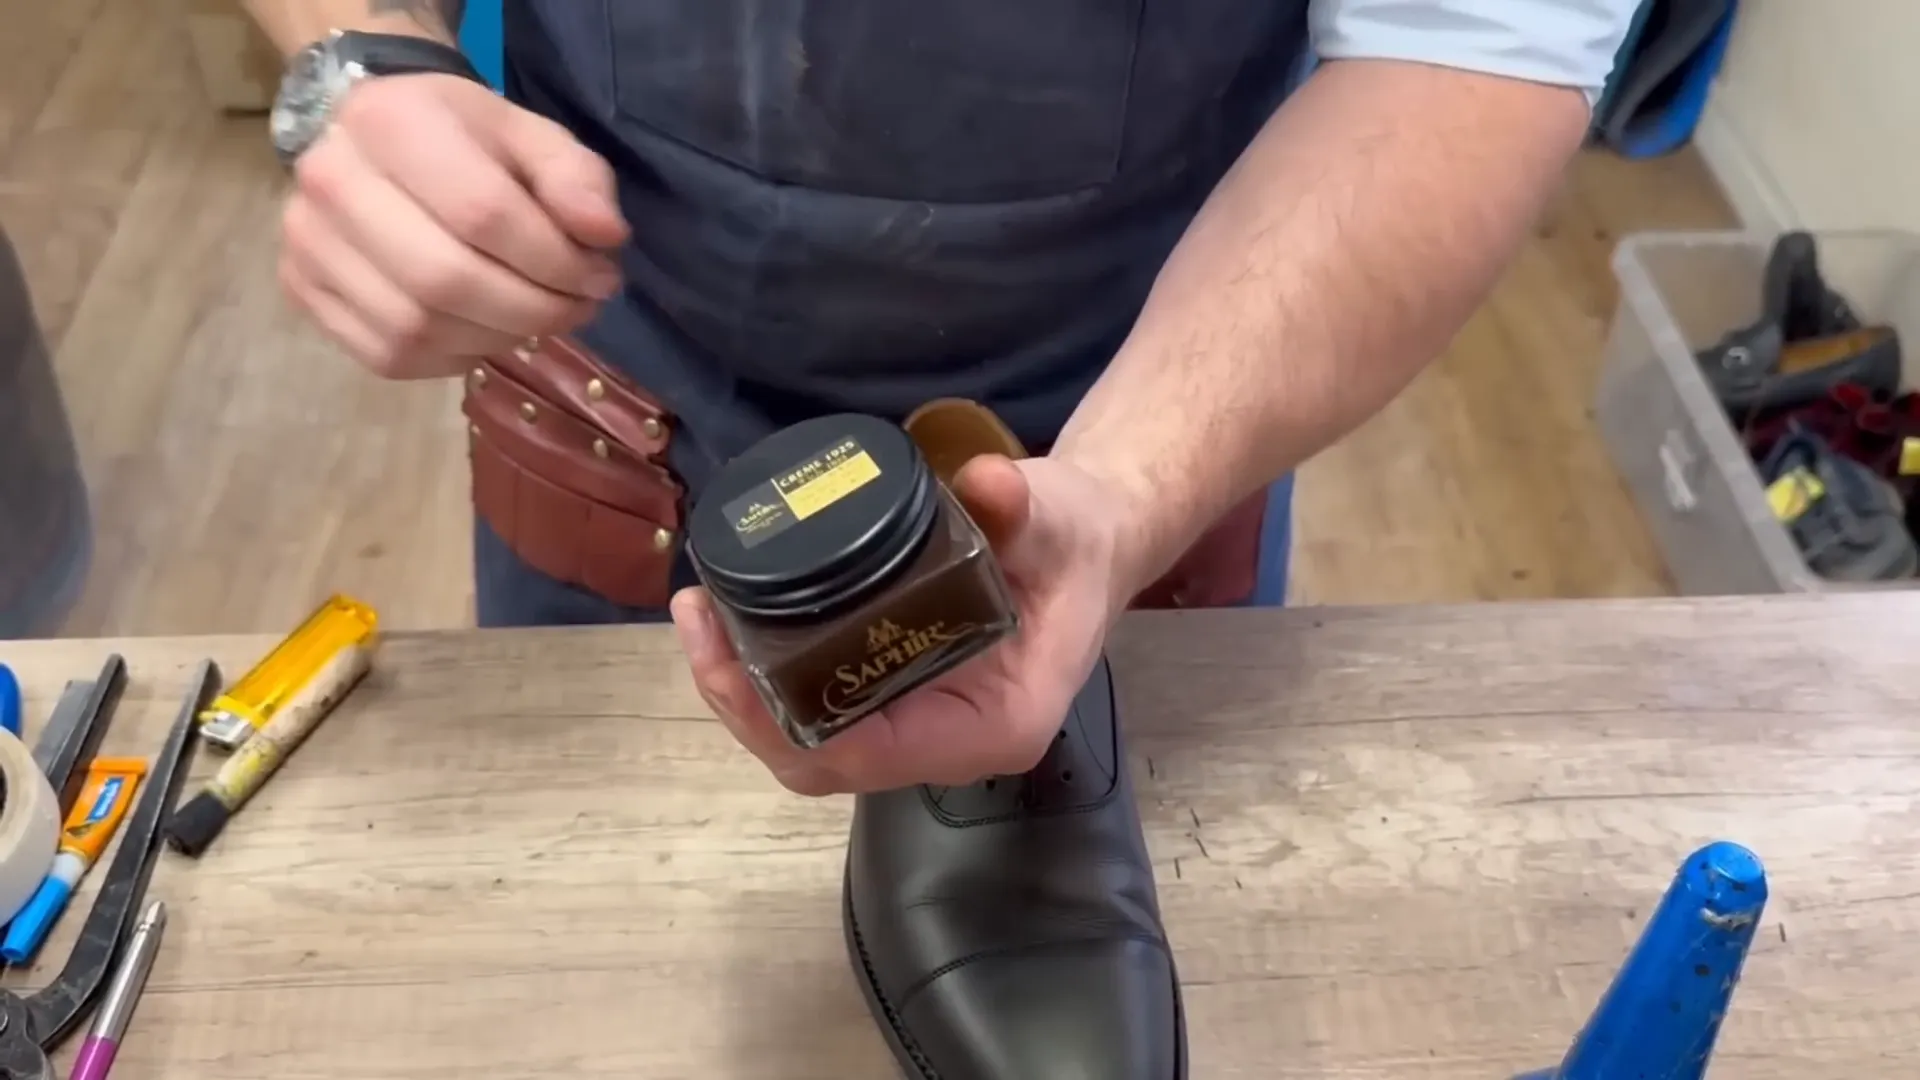
Now, we’re almost finished! To finalize our color change, we need to condition and polish the shoes. We’ll start by applying some shoe cream. We’re using Saphir 1925 cream in a color called Tobacco Brown. It’s perfect for conditioning leather and provides a lovely base layer for our final polish.

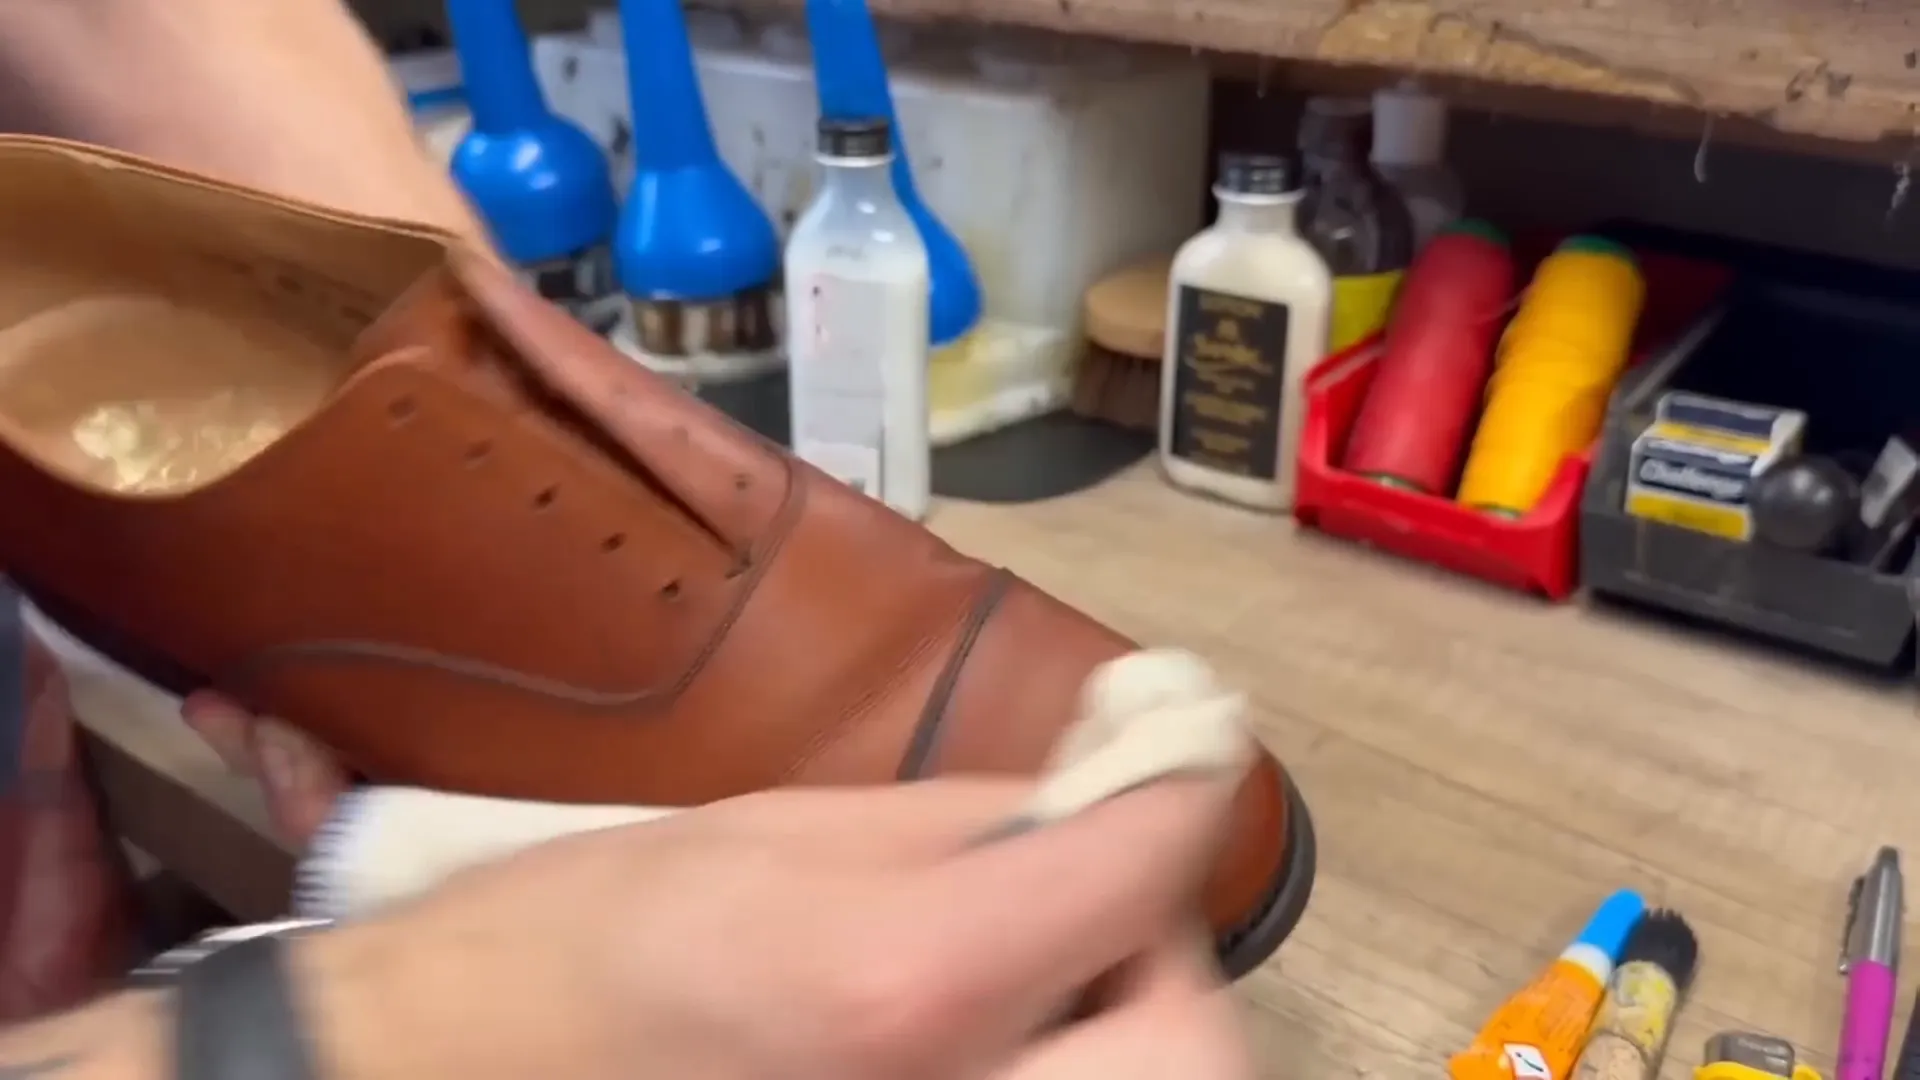
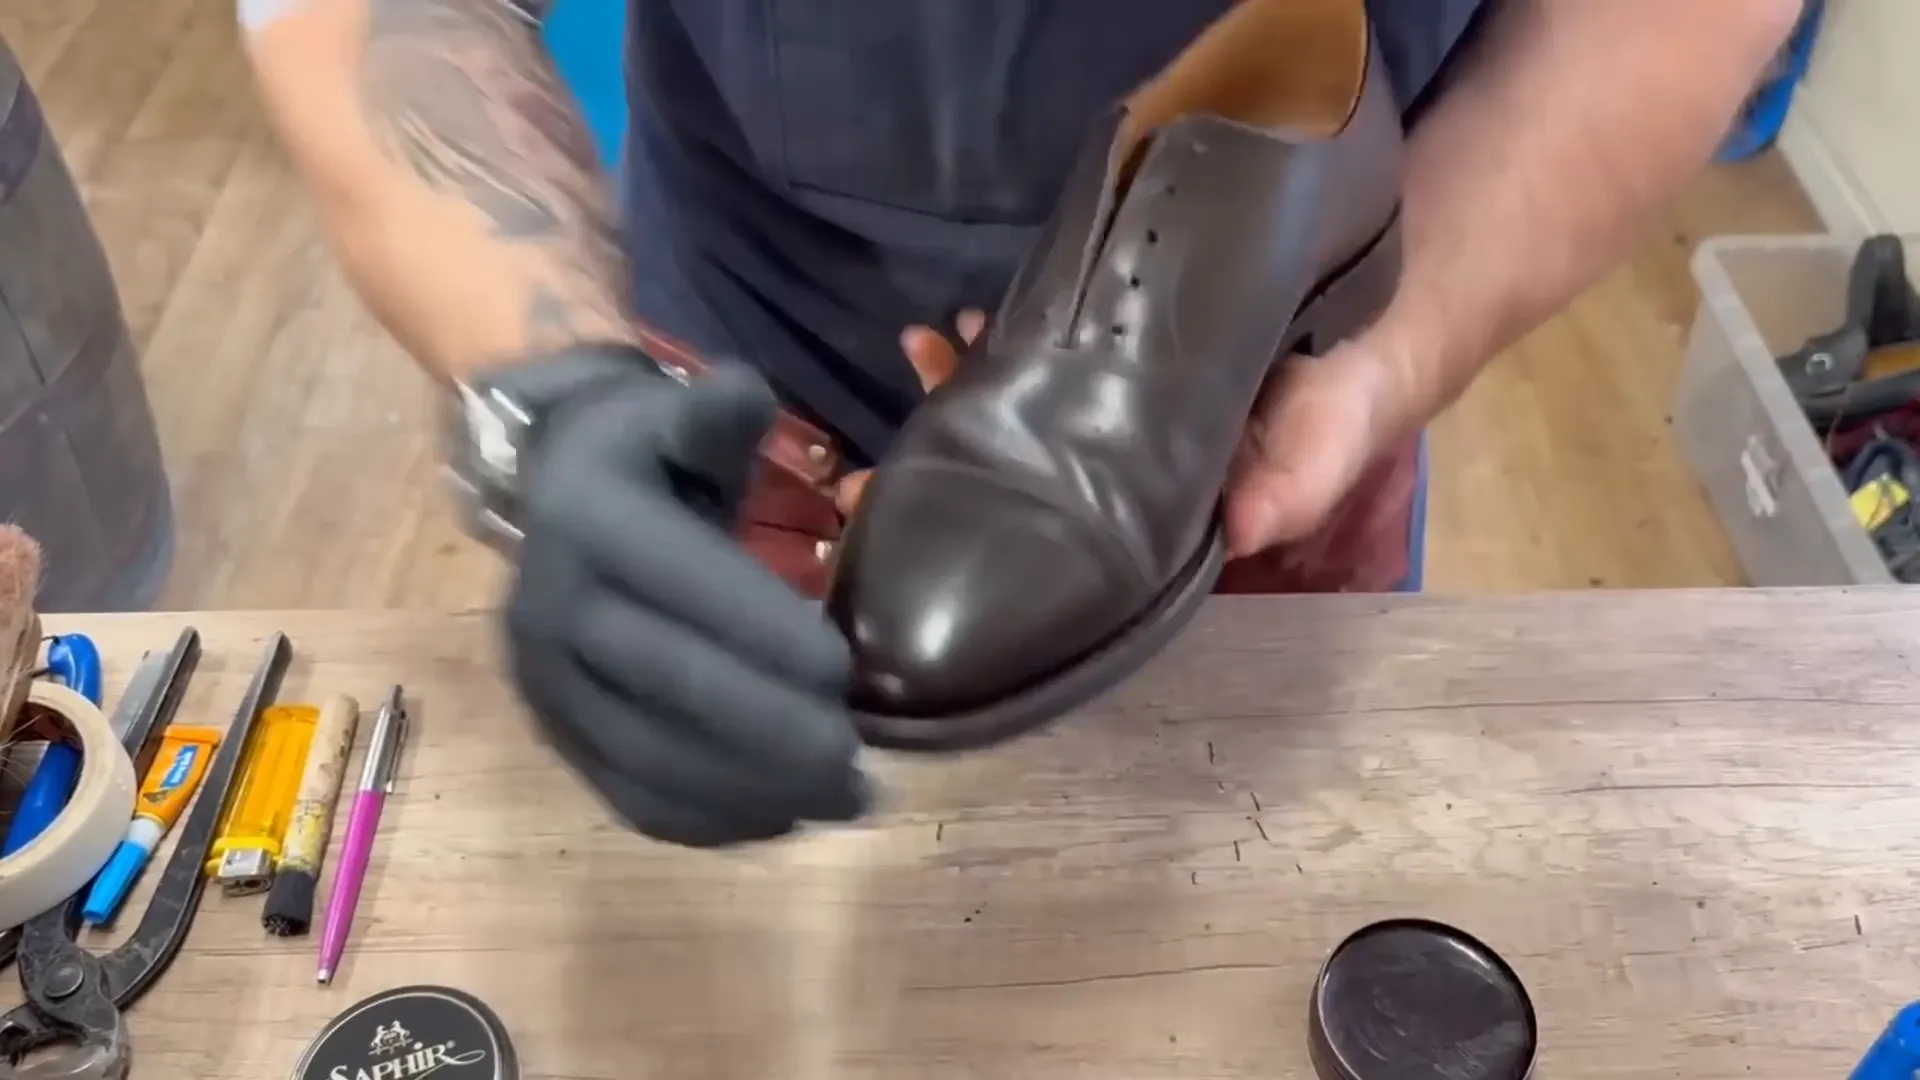
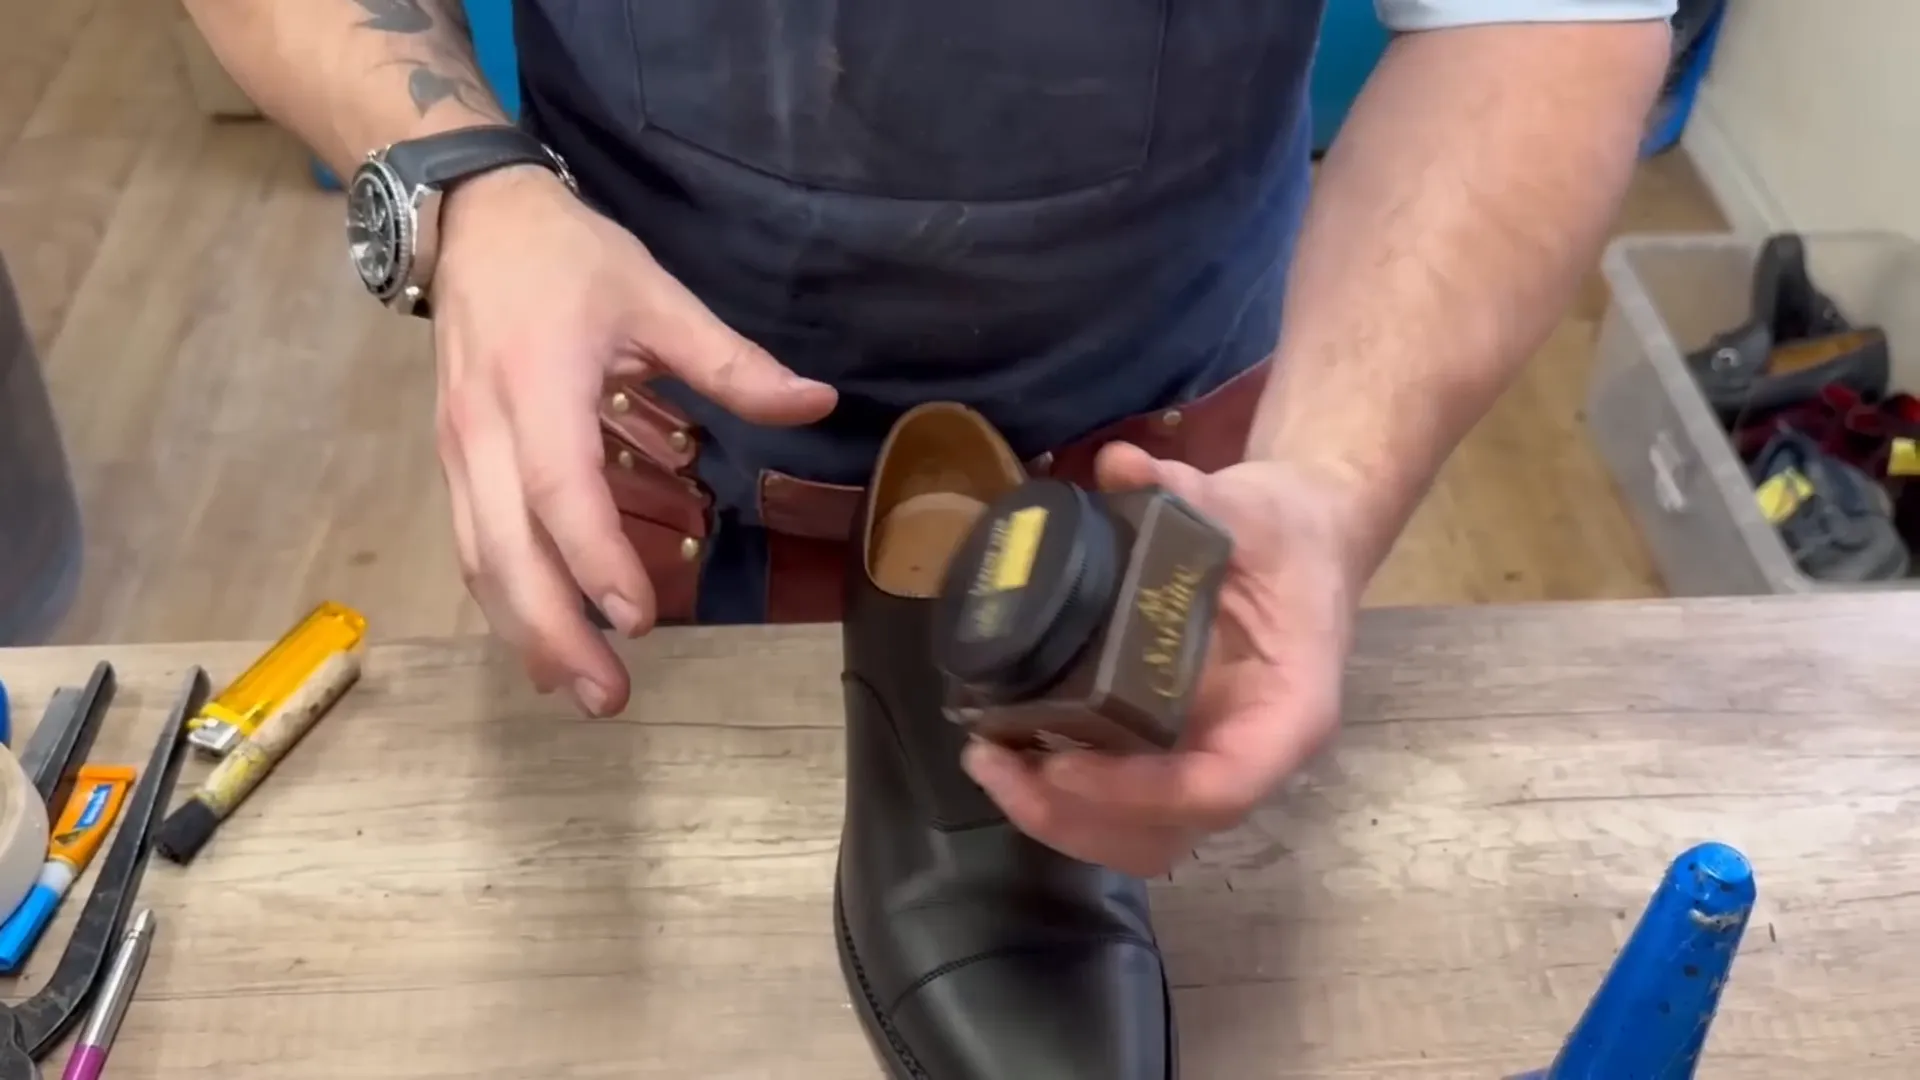
After massaging the cream into the leather, give it about 60 seconds to harden. Once it’s set, we can buff off the excess. You’ll notice a nice shine already forming, but we can take it up a notch with an extra layer of wax polish.
Apply a thin layer of wax polish, also in Tobacco Brown. Remember, multiple layers are key here. Let each layer dry before applying the next, especially on high-traffic areas like the toe. This will ensure a brilliant shine that lasts.
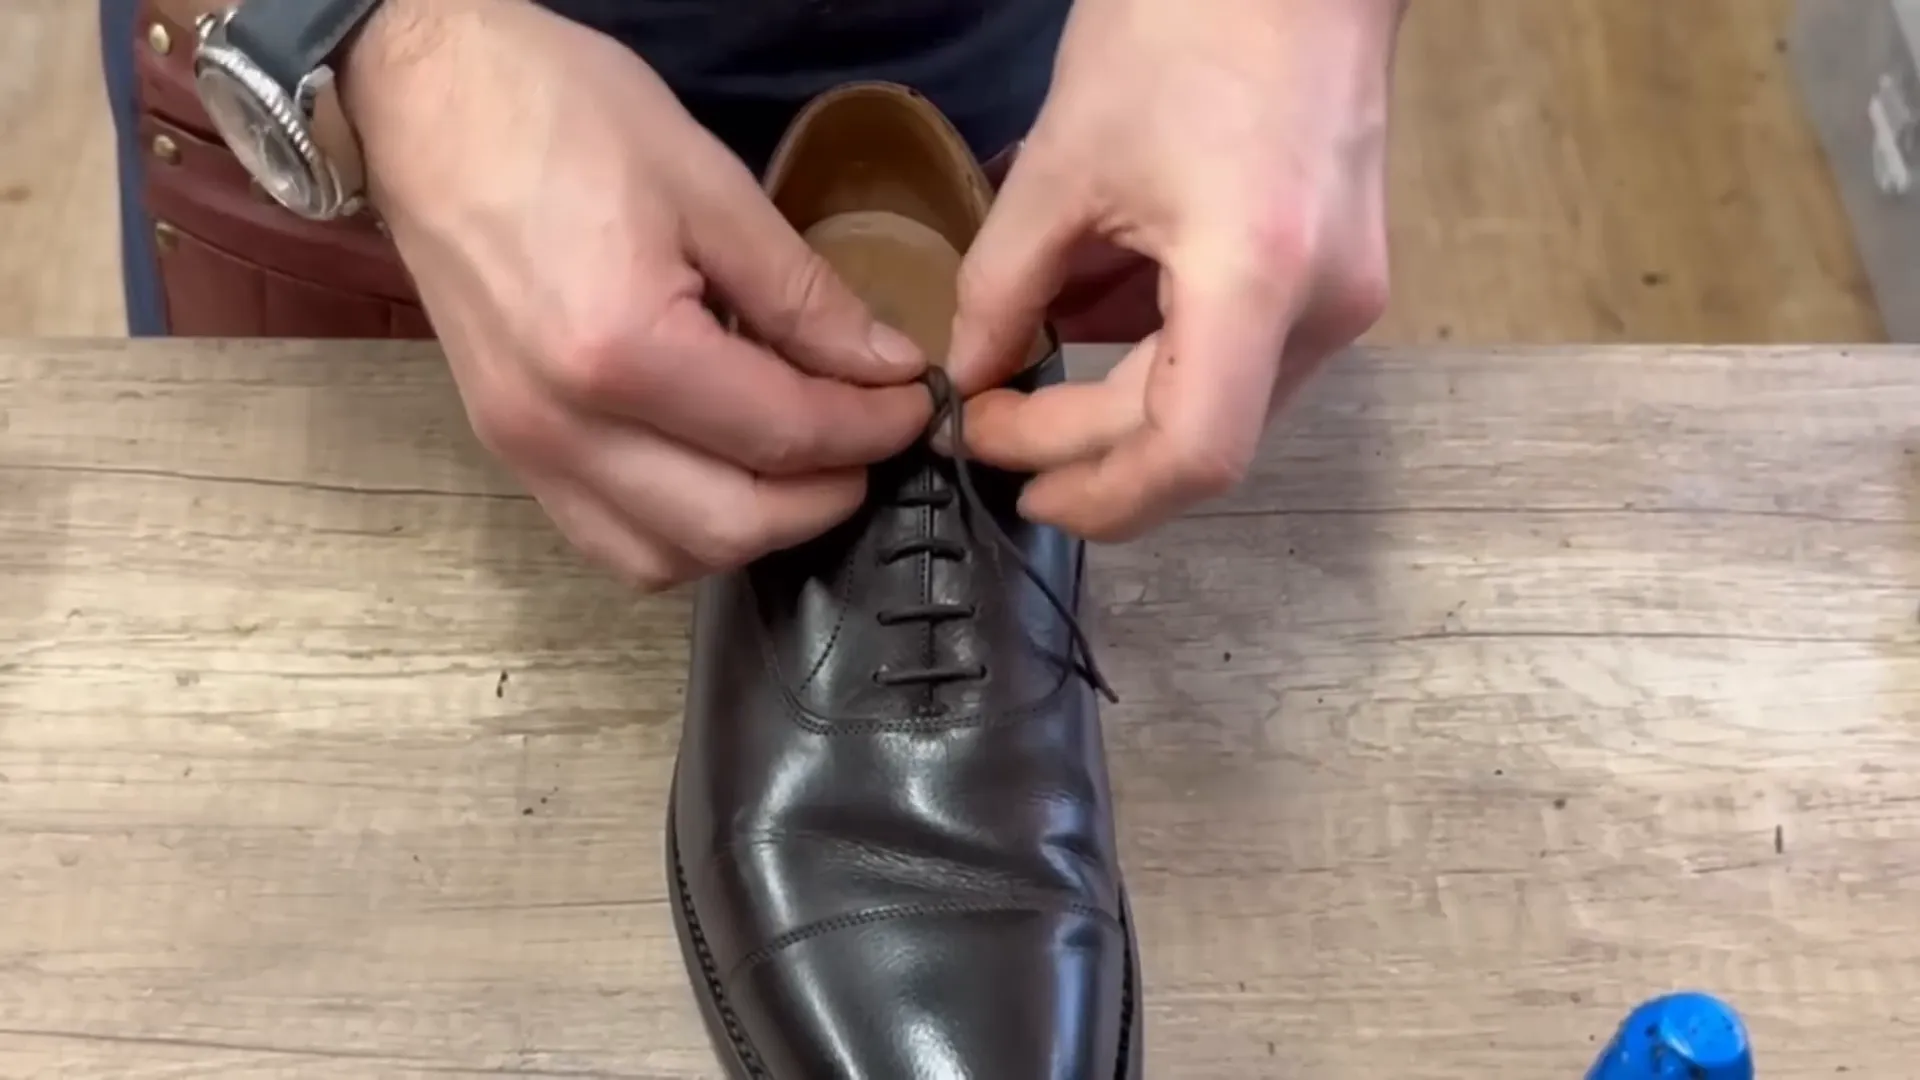
Finally, we’ll finish up by tying the laces. I’ll show you how to do a Parisian knot. Start by making your first loop, go around once, then twice, and pull through the hole in the middle. This knot not only looks great but also holds securely.
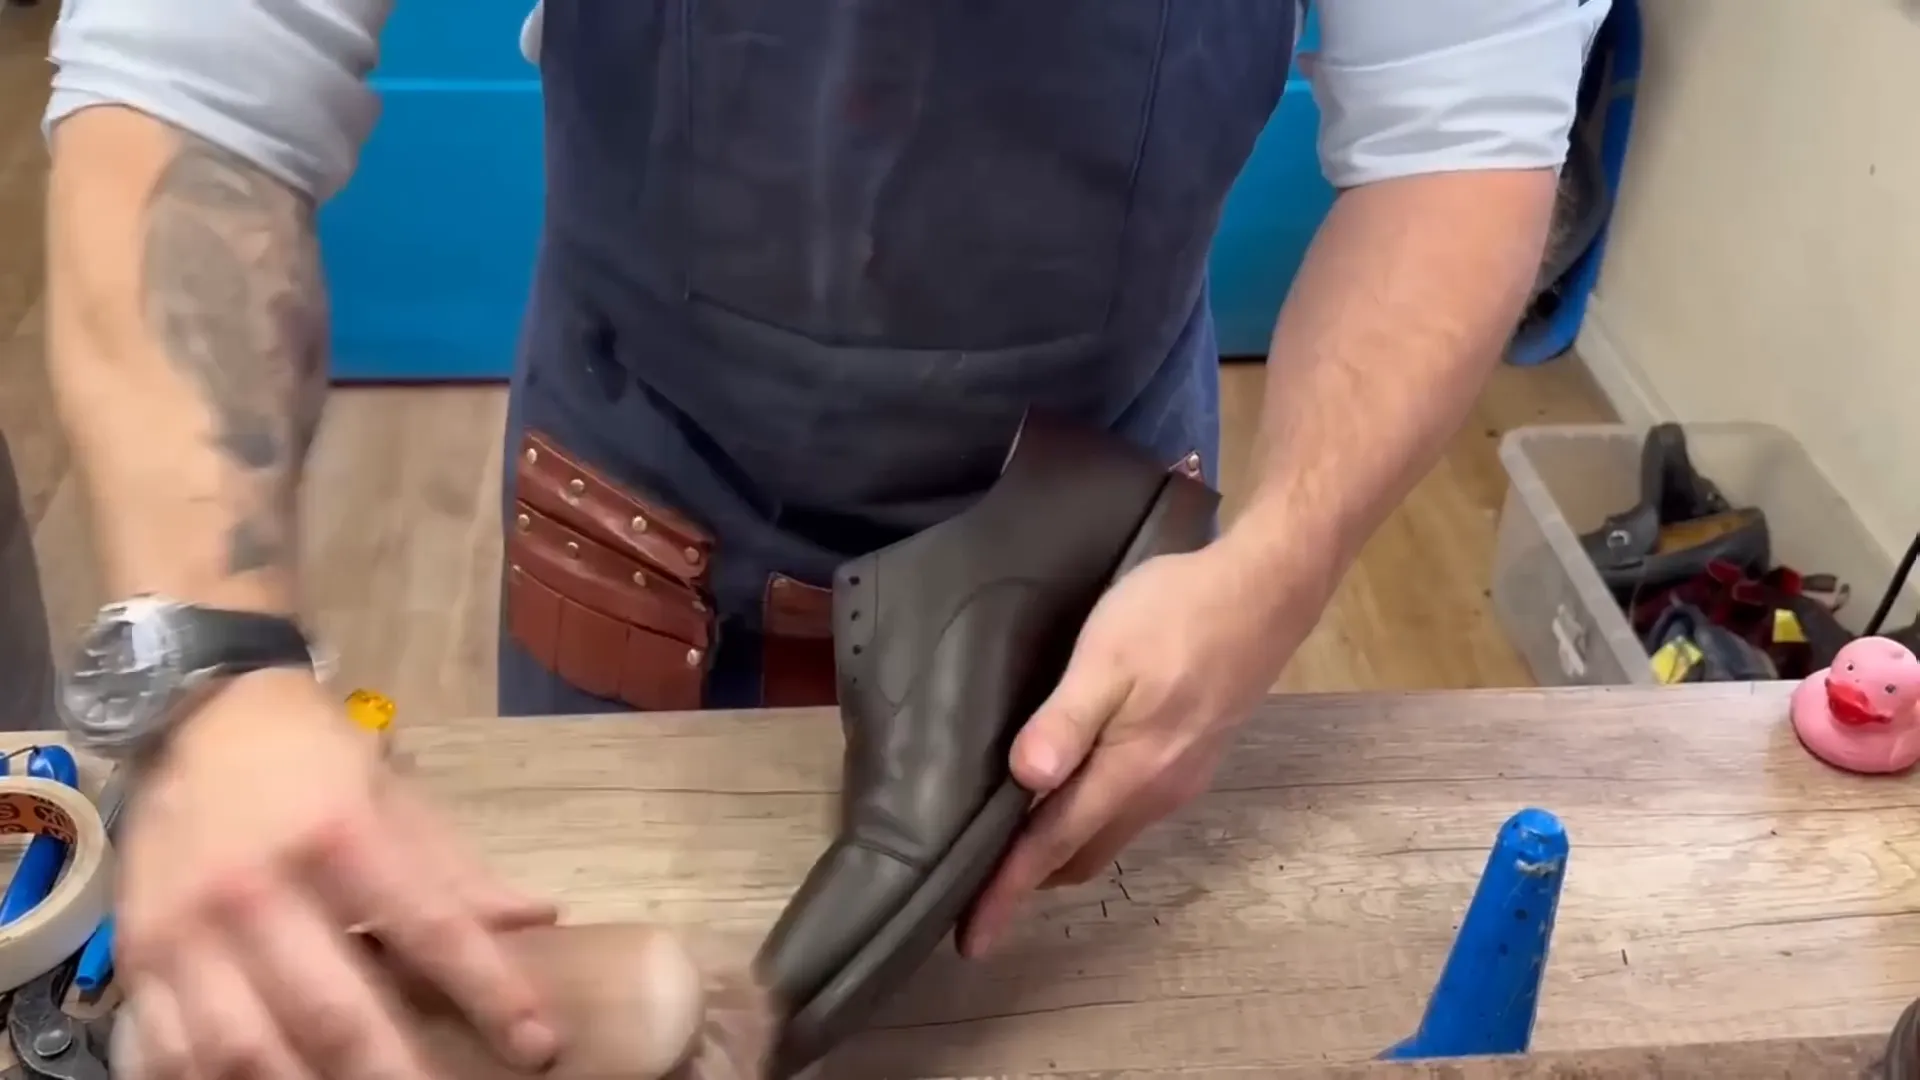
And there you have it! Your shoes have been transformed from a light tan to a beautiful dark tan, ready to complement any outfit. This process isn’t just about changing color; it’s about revitalizing your leather and giving it a new life. Stay tuned for more tips and tricks on leather care!
Alcohol Time
Now that we've removed the old polish and finish, it's time to use some rubbing alcohol. This step is essential to ensure any remnants of the Sapphir Reno Mat are completely stripped away. You want a clean surface for the dye to adhere to, so don’t skip this part!
As you apply the alcohol, the leather might darken momentarily. This is normal and will lighten as it dries. Focus on the creases and areas where product residue might linger. If any residue remains, it could affect how well the dye sets on the leather.
Remember, the tongue of the shoe needs attention too! It’s often overlooked but crucial for achieving a uniform look. Make sure you protect the inside lining with some masking tape before we dive into dyeing.

Meet Kirsty
Before we jump into the fun part of dyeing, let’s take a moment to introduce my trusty camera assistant, Kirsty. She’s been a friend of mine for over 12 years. If you’ve been following the channel, you might remember her from the Captain America video!
Kirsty is not just a great assistant, she’s also a world champion in ladies’ aggressive arm wrestling. Talk about a multi-talented individual! It’s always a pleasure working with her, even when I have to make sure my jokes land well on camera.
Having someone like Kirsty around makes the process smoother and more enjoyable. The camaraderie adds a light-hearted touch to what could otherwise be a tedious task. So, shout out to Kirsty for her hard work and for handling the camera with finesse!
Dyeing
Now, let’s get to the exciting part—dyeing the shoes! We’ll be using Fiebing’s professional dye in a rich chocolate color. This dye is perfect for achieving that dark tan finish we’re aiming for.
Start by applying the dye at the toe cap and work your way up. Make sure to get into the crease between the uppers and the welt. This is where you want to be thorough to ensure even coverage. Don’t worry if it looks a bit streaky initially; that’s completely normal.
Remember, one coat is never enough! You’ll want to apply multiple coats to achieve the desired depth of color. The more layers you add, the richer and darker the final result will be. Take your time with this step; it’s the key to a smooth and uniform finish.

Once the first coat is dry, it’s time for the second. This will deepen the color even further. After both layers have cured, we’ll buff off any excess dye to reveal the beautiful new color!
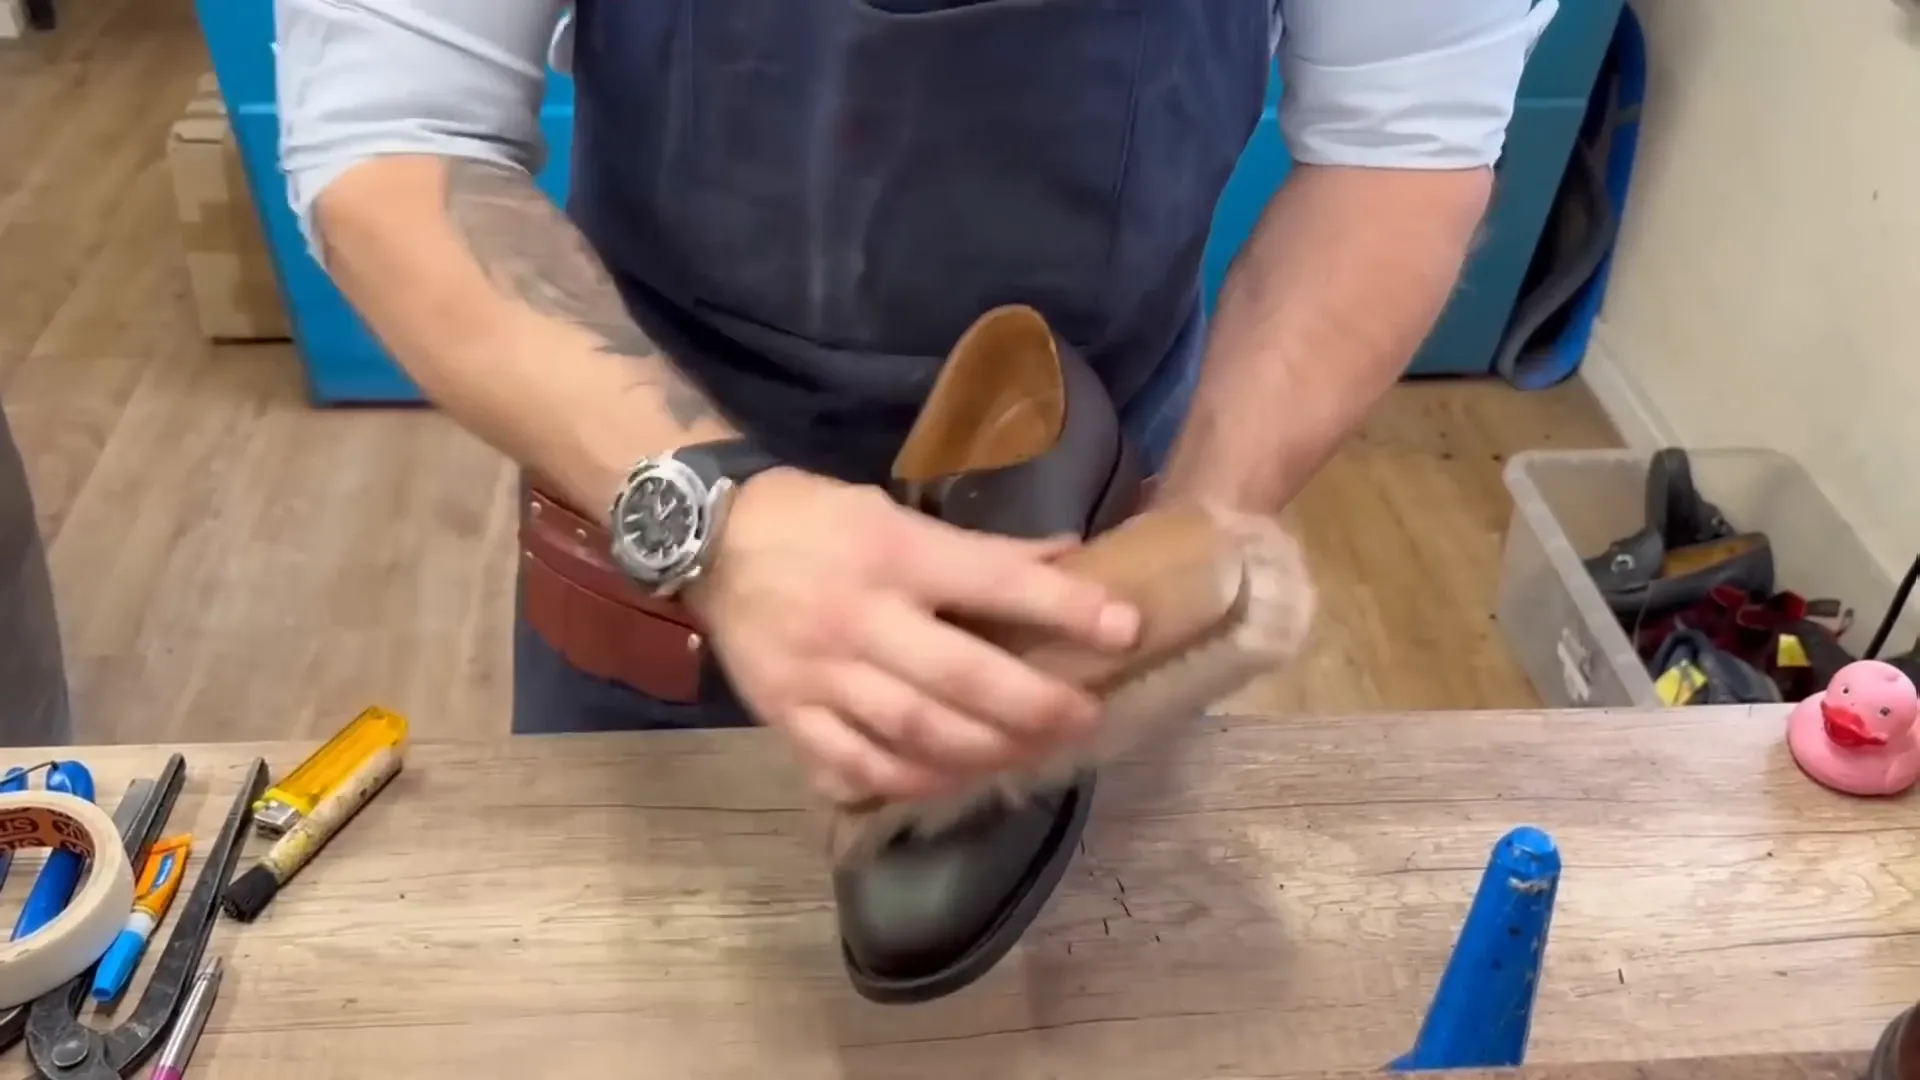
Now, don’t forget the conditioning! After dyeing, it’s crucial to hydrate the leather. We’ll start with some Saphir 1925 cream in Tobacco Brown. This cream is fantastic for maintaining the leather's suppleness and preparing it for the final polish.
Massage the cream into the uppers and let it set for about 60 seconds. This allows the oils and waxes to penetrate the leather. Once it hardens, we can buff it off to reveal a lovely shine.
After buffing, it’s time for the finishing touch. We’ll apply a thin layer of wax polish, also in Tobacco Brown. Remember, multiple layers are essential for achieving that brilliant shine. Focus especially on high-traffic areas like the toe to ensure durability.

Finally, we’ll tie the laces with a stylish Parisian knot. Start by making your first loop, then wrap around twice before threading through the hole. This knot not only looks great but also holds securely.

Nourishing
Now that we’ve achieved a beautiful new color, it’s time to nourish the leather. Conditioning is not just an afterthought; it’s essential for maintaining the integrity of the leather. We’re using Saphir 1925 cream in Tobacco Brown, which is packed with nourishing oils and shea butter.
Apply a small amount to a clean cloth and massage it into the uppers. This step hydrates the leather, ensuring it remains supple and resilient. Give it a minute or two to absorb before buffing off the excess. You'll start to notice the leather transforming as it drinks in the cream.
After buffing, we can see a lovely shine emerging. But we're not done yet! To really elevate the finish, we’ll add a layer of wax polish. This final touch not only enhances the shine but also protects the leather against scuffs and moisture.

Finishing Touches
With the conditioning complete, let’s focus on those finishing touches that will make your shoes truly stand out. We’ll apply a thin layer of wax polish, again in Tobacco Brown. This step is crucial for achieving that glossy finish we all love.

Layering is key here. Let each coat dry before adding the next. Pay special attention to the toe area, as it’s the most visible part of the shoe. A few extra layers here will ensure a brilliant shine.
Don’t forget about the edges of the soles! A quick polish there will tie everything together and give your shoes a professional look. Once you’ve polished the edges, buff them gently to a shine as well.
Now, let’s lace up our shoes. We’re going to use the Parisian knot, which not only looks sharp but also holds securely. Start by making your first loop, wrap around twice, and pull through the hole in the middle. This knot is a great way to finish off your beautifully dyed shoes.

Bloopers
Before we wrap up, let’s have a bit of fun with some bloopers from our dyeing session. It’s always good to have a laugh while working, and sometimes things don’t go as planned. Whether it’s a slip of the hand or a stray dye mark, these moments remind us that it’s all part of the process.
One memorable moment was when I accidentally dyed my fingers. Trust me, it’s not a good look! Lesson learned: always wear gloves! And let’s not forget about the occasional banter with Kirsty. Her reactions to my jokes always add a light-hearted touch to the day.
These little mishaps are what make the process enjoyable. They remind us that even in a craft as precise as shoe dyeing, there’s room for humor and fun. So, don’t take it too seriously—embrace the quirks and enjoy the journey!
In conclusion, dyeing leather shoes is both an art and a science. With the right techniques, products, and a bit of patience, you can achieve stunning results that breathe new life into your footwear. Don't hesitate to experiment and make it your own. Happy dyeing!